First of all you need to sign up and create an account online. Click to create account
SFBB Pro has two parts; online where settings are made and the app where the actions are performed. Once you've setup your account, you have a login which can be used online and on the app.
The SFBB Pro app can be dowloaded from the google playstore and Apple App Store.
Click to download from the Google Play Store
Click to download app from the Apple App Store
Online / Admin Website - owner and manager functions. Settings for alerts and email notifications. Create and manage the checklists: Opening, Closing, Probe and Weekly checklists.
The App: This is where day-to-day checks are performed by the kitchen team. Carrying out checklists, inputting deliveries and incidents and resolutions.
Once you successfully signed up you can login to the website dashboard. Here you configure your food safety system.
You’ll see the Home screen.
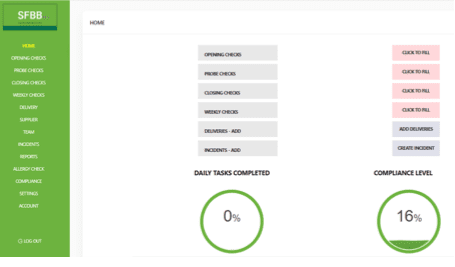
The above screen is where you’ll configure the app to the needs of your restaurant. When you first login the checks will be shown in red which means configuration is needed, and COMPLIANCE LEVEL will be 0%.
Let’s start with setting up your suppliers.
Setting Up Your Food Safety System
Setup SUPPLIERS
Click SUPPLIERS from the menu on the left.
Click Create and fill in the fields.
 Click Create to your supplier.
Carry on entering your suppliers into the system. Once complete you can then track deliveries, maintaining compliance with food standards.
Configure SETTINGS
Click SETTINGS on the left.
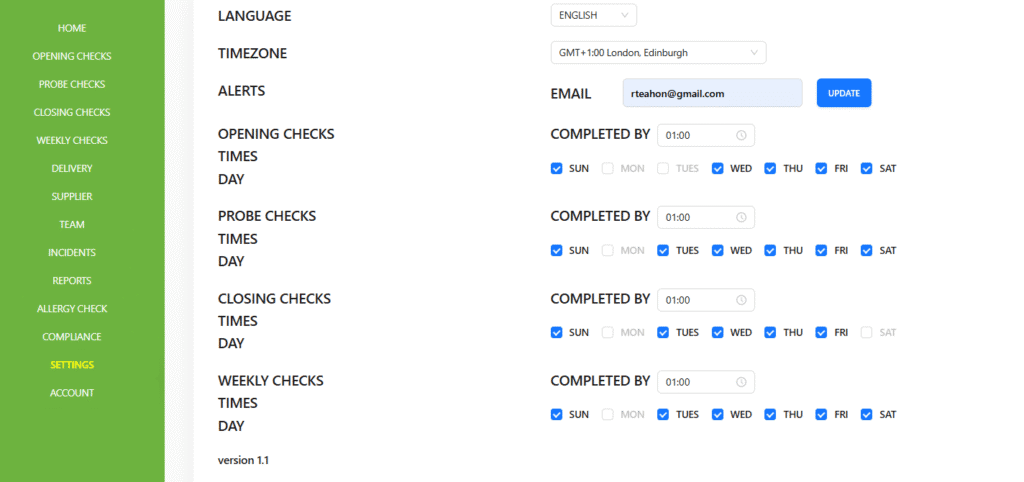
From here, check the language and timezone are correct.
Enter an email address to receive alerts. Click UPDATE. You’ll now receive alerts when checks are due which is handy!
You’ll see OPEN CHECKS, PROBE CHECKS, CLOSING CHECKS, WEEKLY CHECKS. In the corresponding COMPLETED BY enter the latest time the checks are to be carried out.
Select the days of the week the checks are to be carried out for each one.
Enter your TEAM
Click TEAM from the left menu. You’ll see this screen:

Click add new team member – the blue button top right.
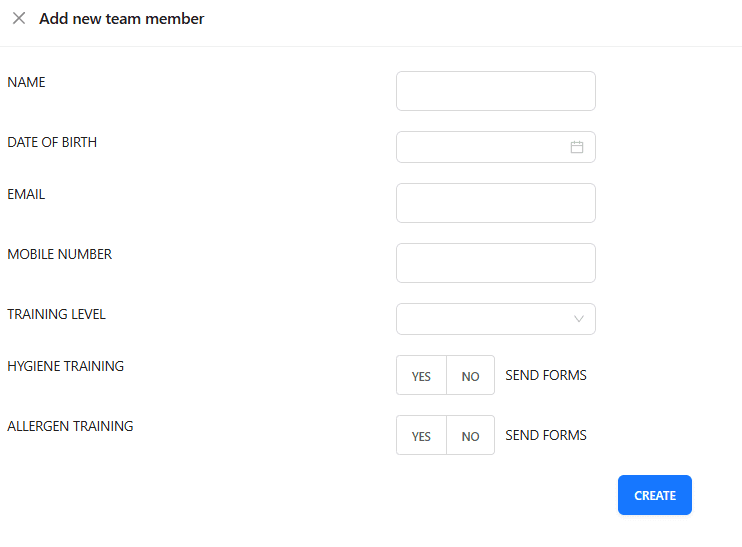
Complete the fields and click CREATE. Do this for all staff.
The TEAM will appear on the TEAM screen. You can view, edit, or delete staff from this screen as necessary.

Configuring OPENING, PROBE, CLOSING CHECKS
Click OPENING CHECKS
Start by choosing either OPENING CHECKS, PROBE CHECKS, or CLOSING CHECKS. They work in the same way.
If you’re checking the temperature of an appliance, select OPENING CHECKS. Type the appliance name in the text box and click ‘Add Section;. This appears in the green box as shown below. 👇
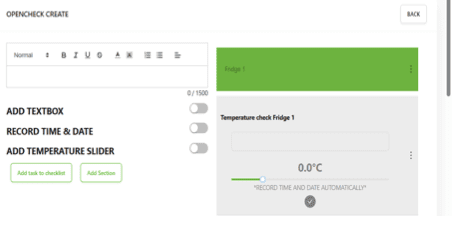
Next, it is time to add what you’re checking. In the above example we are checking the temperature of Fridge 1. Note Fridge 1 corresponds to the heading in green.
So, type the text you want in the checklist in the text box. If you want to add a text box, record time & date automatically, and add a temperature slider, slide the corresponding buttons to the right so they are now green.
Text boxes are a good idea to record the staff member that is taking the temperature of the appliance.
Repeat the process for all appliances you need to check.
Next click CLOSING CHECKS. Duplicate what you did in OPENING CHECKS so you can show a record of temperatures for each appliance at the beginning and end of a given time period, i.e. daily.
The standard Opening and Closing Checks required are below. You can copy and paste these into your system. You also need to create a Cleaning Schedule for Opening, Closing and Weekly to be carried out.
COPY AND PASTE INTO OPENING AND CLOSING:
OPENING CHECKS
You should do these checks at the beginning of the day. You can also add your own checks to the list.
- Your fridges, chilled display equipment and freezers are working properly.
- Your other equipment (e.g. oven) is working properly.
- Staff are fit for work and wearing clean work clothes.
- Food preparation areas are clean and disinfected (work surfaces, equipment, utensils, etc.).
- All areas are free from evidence of pest activity.
- There are plenty of handwashing and cleaning materials (soap, paper towels, sanitiser, etc.).
- Hot running water is available at all sinks and hand wash basins.
- Probe thermometer is working and probe wipes are available.
- Allergen information is accurate for all items on sale
CLOSING CHECKS
You should do these checks at the end of the day. You can also add your own checks to the list.
- All food is covered, labelled and put in the fridge/freezer (where appropriate).
- Food on its Use By date has been thrown away.
- Dirty cleaning equipment has been cleaned or thrown away.
- Waste has been removed and new bags put into the bins.
- Food preparation areas are clean and disinfected (work surfaces, equipment, utensils etc.).
- All washing up has been finished.
- Floors are swept and clean.
- ‘Prove it’ checks have been recorded.
Configuring PROBING CHECKS
Probing checks works in exactly the same way as OPENING CHECKS and CLOSING CHECKS, but as you know this refers to food.
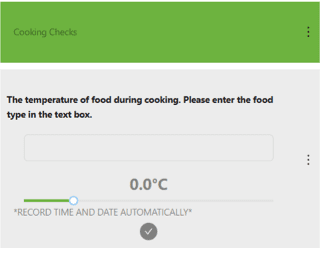
In the above example the text box is used to record food type. You should configure it as you see fit. You may want to put the food-type in the green box. It’s up to you.
Configuring WEEKLYCHECKS
The process is very similar to CREATING OPENING CHECKS. Select WEEKLY CHECKS from the lefthand menu.
You create the checklist and section as you did before. As you can see in the below example, because temperature isn’t appropriate we haven’t included it. This is designed to be configurable to your business needs.

You’ve probably noticed three dots on the right of both Section and Checklist. This can be used to move sections and checklists up
5. USING THE APP
5.1 Checklists, Recording Food Temperatures
On your device you’ll see this screen.
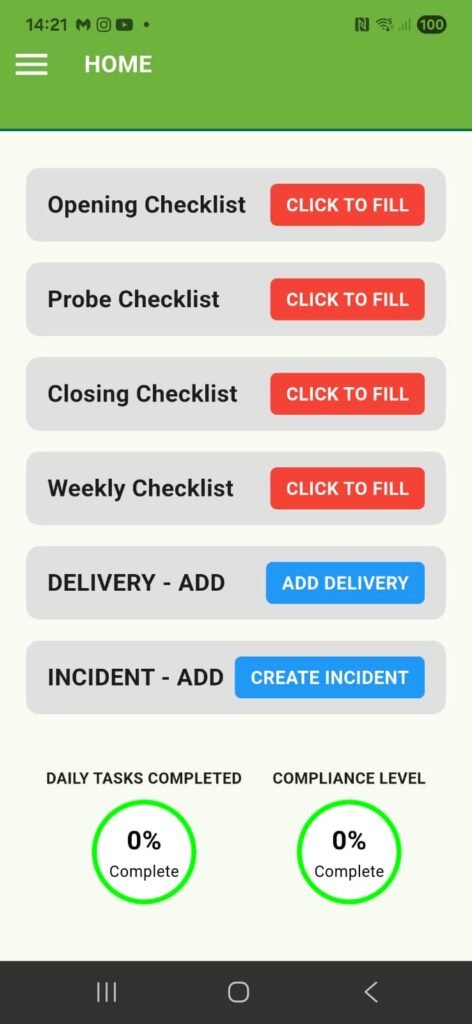
Choose the appropriate checklist. You’ll see a screen similar to the one below. 👇
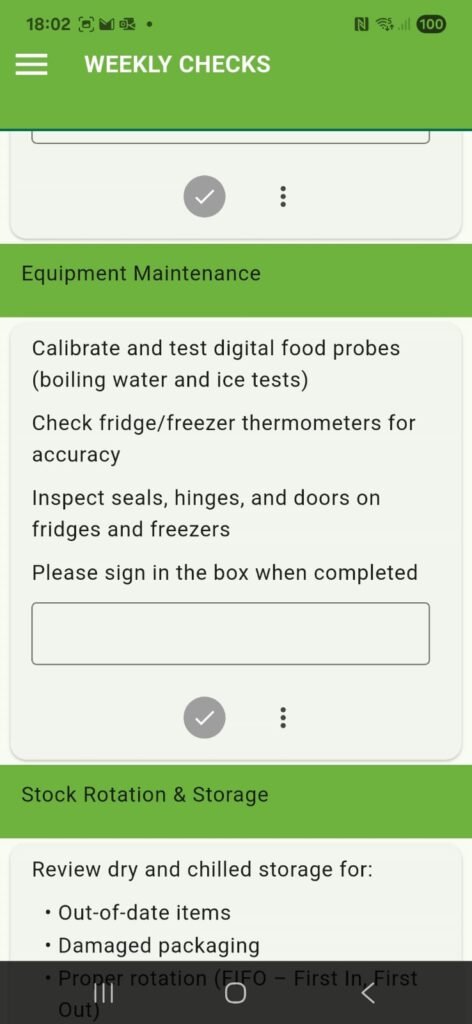
In the above example for WEEKLY CHECKS, you would carry out the tasks as described under Equipment Maintenance, enter your name in the text box when complete, and click the tick.
This tells the system the task is done which is recorded in the administrator.
If your check is for temperature and has a slider, simply slide to the right temperature, fill in any text boxes and click the tick.
Again, this is recorded in the administrator.
As daily tasks are completed the percentage score shown on the Home screen will move upwards from 0%. Once all are complete it will show 100%.
5.2 RECORDING DELIVERIES
Every delivery you receive you can enter your supplier, the invoice number, quantity, record the condition of the delivery, and take temperature if necessary to ensure compliance.
Should the supplier be new you can set them up on the same screen simply by clicking the Add Supplier button. See below. 👇
 | |||
 | |||
Fill in the fields. You can select the supplier from the dropdown menu. It corresponds to the suppliers you set up earlier.
Once fields are complete, click submit to enter the delivery details. If the supplier isn’t on the list, click Add Supplier and enter details direct into the app.
Should the checks show an issue, record this in the INDICENT section of the app.
5.3 RECORDING AN INCIDENT
If you CREATE INCIDENT, you’ll see the screen below. 👇
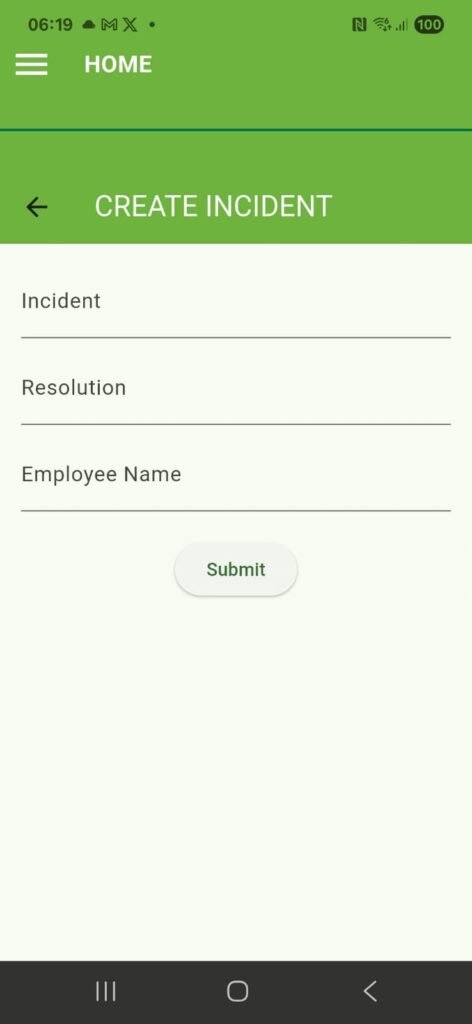
Simply complete the fields and click Submit. This is now recorded in the system.
6. COMPLETING COMPLIANCE
If you select the COMPLIANCE section from the menu, you’ll see this screen.

This section is to show that you take food safety seriously and is digital way of recording that you do. The advantage here is that you don’t have to hold a written record and can bring up a digital copy at a button push.
This mirrors the critical control points developed by HACCP (Hazard Analysis and Critical Control Point).
You only have to complete the modules that apply to your business. If a module is not applicable, just make a note within it.
When completing the topics, you either click the tick to show you understand a particular concept or enter an answer in the given text box.
Once complete, you click Submit and your percentage score will increase. In the above example, the CLEANING module has been completed.
This will also show on the Home screen of the app.
7 ALLERGY CHECK
Selecting ALLERGY CHECK brings up the following screen. 👇
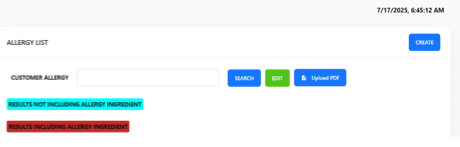
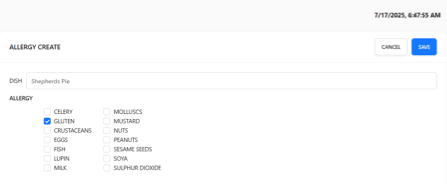
If you click CREATE (Top right), you can enter the allergies associated with your dishes.
In the below example, we’ve selected GLUTEN as the allergy in a specific dish. Once you’ve entered the details click Save.
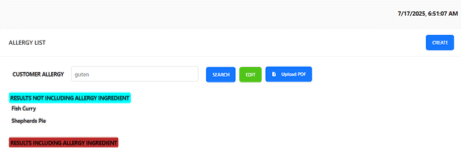
Once complete the associated allergies are in the system.
If you go back to the ALLERGY CHECK and type in the allergy all dishes which feature the allergy are shown.
Our digital sliders mean it takes seconds to walk round and record the temperatures of your fridges and freezers. All temperatures. All data is saved to the cloud and recorded in a daily report.
All data is stored in the cloud. Reports are available for 1 day, 1 week, 1 month, and custom dates at the touch of a button.
Our food safety system is completely intuitive and takes minutes to setup.
Yes - the SFBB pro app is the only digital food safety app which offers multiple languages including: French, Italian, Turkish, Chinese, Indian, Thai, Arabic. We can also add more languages on request.
You can write in these languages and the system will also translate back to English.